Monday, January 26, 2015

Blood and Roses 1st St. Albans part 2

Up front I'll say I'm still not sure if I like this game.  Admittedly I LOVE this game, as in I love playing out battles from the Wars of the Roses.  I'm still not sure how much I like the games mechanics, which I assume are similar to the other games in the Men of Iron series from GMT (the other games being Men of Iron and Infidel).

The cleverest mechanic and one I'm going to steel (get it?) for miniatures play is the activation system.  The way it works is whoever goes first in the scenario gets a "free activation," which means he can activate any one of his "battles"/divisions, his entire army for strategic movement (in the St. Albans scenario the armies start the game too close together to use this), or the army's standard.  Once he's completed that activation, he may attempt to activate another single battle, but he has to make a die roll based on the leadership quality of the battle's commander and he can't activate the same battle that just activated, unless that's the only battle left in his army.  If he succeeds he may activate the battle, and once finished make another attempt to activate another battle just like before, only each subsequent die roll becomes more difficult since you add one to each attempt.  You're trying to roll equal to or less than the commanders leadership with a d10, with most commanders being in the 3-4 range.  Once you fail this roll or pass your opponent gets a free activation as above and goes from there just like the starting player.

Why would you pass?  If the scenario has a time requirement, wherein one side has to achieve victory in a certain number of turns, the other player can pass and advance the time by one.  1st St. Albans has this with the Yorkists having to achieve their victory conditions before time expires.

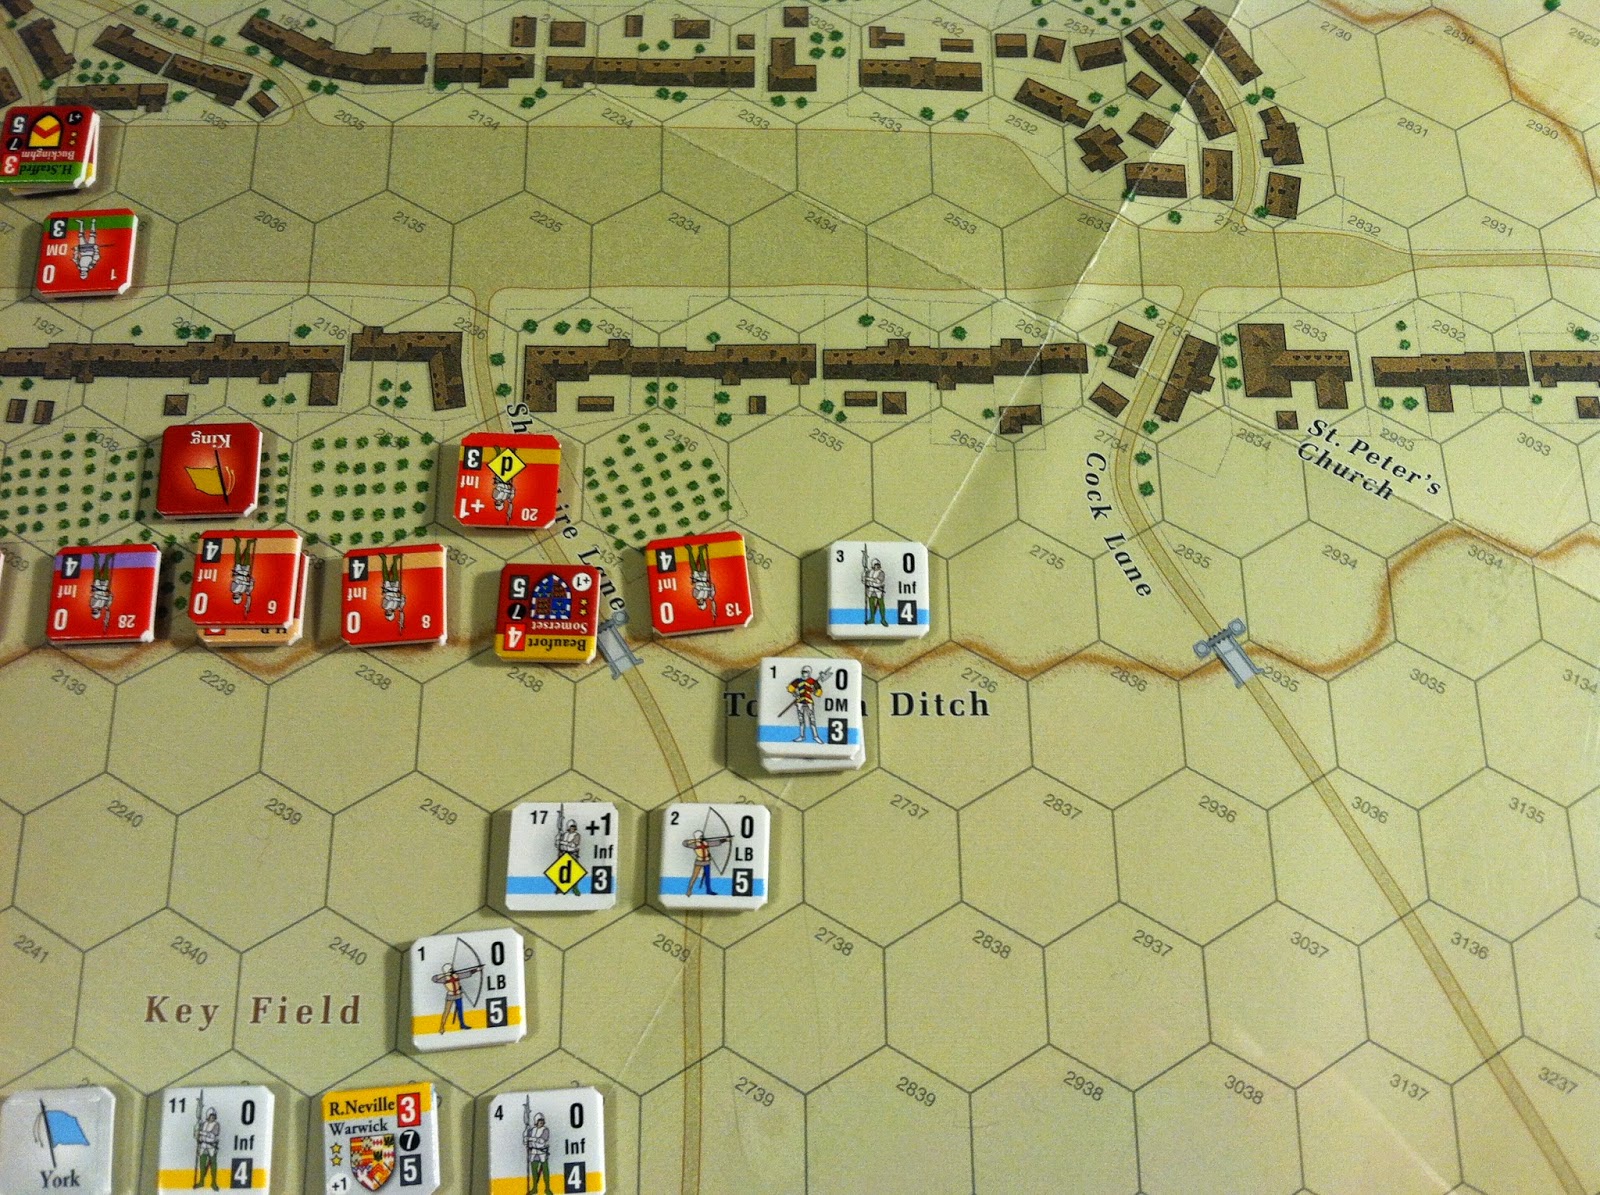
The movement is pretty straightforward and similar to other hex and counter games.  Each scenario has special rules governing the unique terrain where the historical battle was fought (such as the ditch that surrounds St. Albans).

The combat is where I'm not completely sold.  When your units move into combat with the enemy, you don't have to attack.  But, if you do you have to attack all the enemy units you're in contact with.

So in the above photo if the Lancastrians (red) wanted to attack the Yorkists, that single unit would have to attack both of the enemy units that it's in contact with.  I like this and it feels fairly realistic in that units can't single out enemies while ignoring others that are right next to them.

What I'm not sure about is how you actually do the combat.  The game has a lot of modifiers for the attack roll, around a dozen or so.  This is a personal pet peeve of mine that I don't like having to add and subtract numerous modifiers.  I'm not saying it's horrible, it's just doing a lot of something that I generally don't like.  But it's probably a testament to how good the game is in that I seem to enjoy playing in spite of this.

Next up I'm going to tackle one of the larger scenarios.  2nd St. Albans maybe?

Sunday, January 4, 2015

Blood and Roses: 1st St. Albans

Blood and Roses is the third game in GMT's Men of Iron series and covers several battles of the English Wars of the Roses.  1st St. Albans is the smallest scenario in the game and seems to provide an excellent tutorial to the system.  In this post I will present a narrative description of the game I played, while in a subsequent post I will go more into the game's mechanics.

Historically the battle was the culmination of a long running feud between Richard Plantagenet, the Duke of York, and Edmund Beaufort, the Duke of Somerset.  York had largely been denied what he thought was his rightful place in England's political apparatus, and he and his ally Richard Neville, the Earl of Warwick, feared that with Somerset's resumption of his position as "Protector" they would be cast as traitors to the crown and they and their families ruined.

Henry VI and Somerset (along with Humphrey Stafford, Duke of Buckingham; Henry Percy, Earl of Northumberland; and Thomas Clifford, Baron de Clifford) and their retainers were marching to Leicester for a meeting of England's nobles.  York and Warwick sought to intercept the King and make their case before the council meeting was held.  Most accounts have the Yorkists initiating hostilities, with the Lancastrians expecting a peaceful resolution.  A flanking maneuver by Warwick routed the Lancastrian forces and captured the King.

What follows is a description of the scenario in Blood and Roses and the outcome of a game I played solitaire.


Here we see the Yorkist right "battle" (typically armies were divided into battles, usually left, right, and center), under the command of the Duke of York attacking the Lancastrian right under the command of Duke of Somerset.  The Lancastrians (red counters) were holding the bridges that spanned the Tonman Ditch which provided the only easy access to the town of St. Albans.  York's longbowmen softened up the Lancastrian infantry before the Yorkist infantry engaged.  Instead of trying to storm across the bridge, the Yorkists crossed the Ditch with their infantry in a flanking maneuver as their dismounted men-at-arms attacked straight into the Lancastrian footmen.


Here we see that York has pressed his attack, with all but one of his units having crossed the Ditch and are now flanking the Lancastrian line.  Additionally, Warwick's center battle has advanced and is threatening the Lancastrian front.


Responding to the attack on their left, the Lancastrian right battle under the command of Clifford have pulled back from the Ditch and are attempting to take up defensive positions in the town near the King.  However, the Yorkist left under the command of Richard Neville, the Earl of Salisbury, are pressing home an attack of their own.  One of the Lancastrian infantry units has been forced to retire to the Lancastrian standard (the flag labeled "King" isn't the actual king, rather it denotes the location of the Lancastrian standard which is used for rallying purposes) as the Yorkist left flank attack now appears to be the most dangerous.  Henry VI is located with Buckingham, behind the man-at-arms and Clifford.


The Yorkists have decided to concentrate their efforts against the Lancastrian right, though by now the King's lines are disintegrating.  Their last hope is to barricade themselves in the town and hope for a miracle.


The King's final stand!  Henry VI, along with Clifford, Buckingham, and their retainers hold up in a house adjacent to the Abbey in a final fight against Salisbury's men.  To make matters worse, York's soldiers are advancing from the other direction.  The end must be near...


And there you have it.  In the melee Henry VI is cut down, while Clifford and Buckingham escape to fight (or negotiate) another day.  Presumably with Henry's death the Duke of York would seize the crown while Somerset and his allies flee England.